
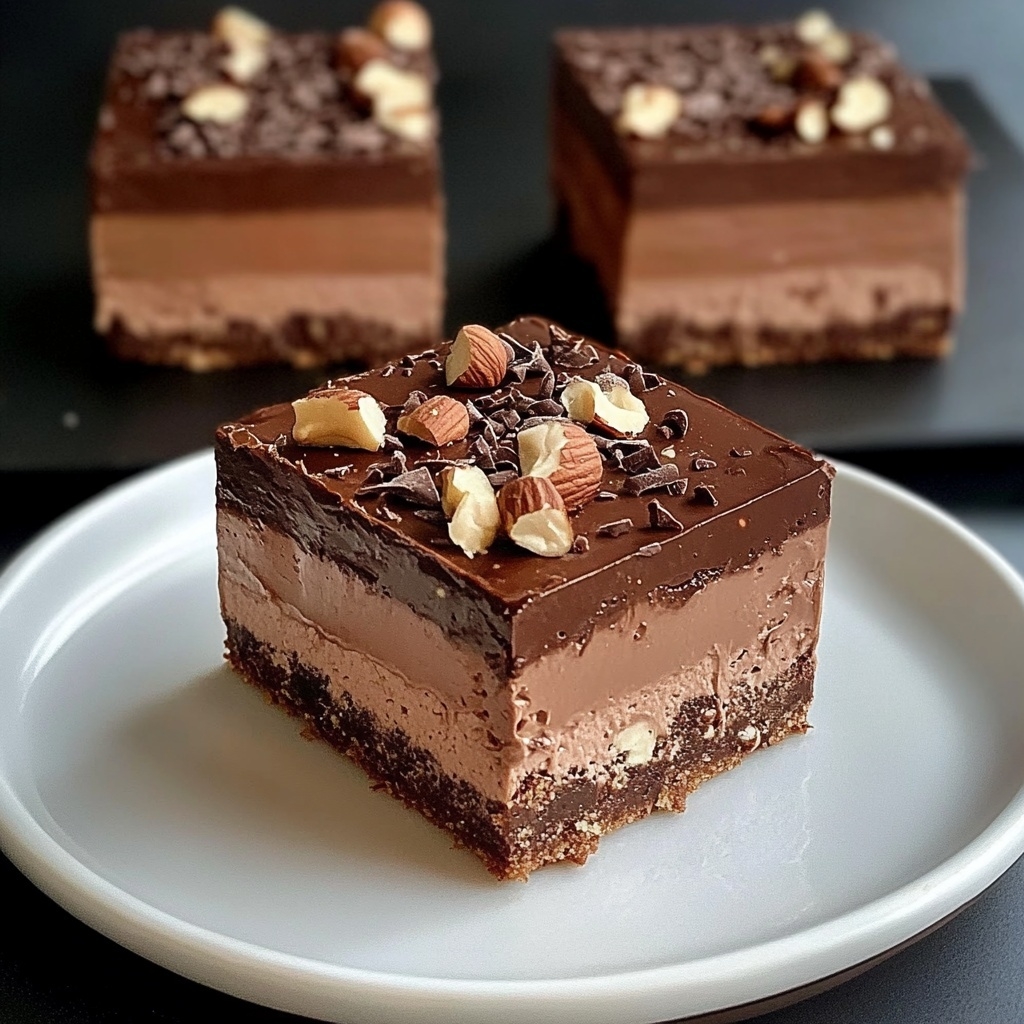
If you love the irresistible combination of creamy chocolate and nutty hazelnuts, these No-Bake Chocolate Hazelnut Mousse Cake Bars are the dessert of your dreams. Smooth, rich, and delightfully indulgent, this recipe delivers all the flavor of a gourmet patisserie dessert — without ever turning on your oven.
With layers of silky hazelnut mousse and a buttery cookie crust, these bars are the perfect treat for holidays, dinner parties, or an elegant after-dinner indulgence. Easy to make ahead and simple to store, they’re as practical as they are luxurious.
Ingredients
Serves 12 bars
For the Crust
- 2 cups (200g) crushed digestive biscuits or graham crackers
- ½ cup (115g) melted unsalted butter
- 2 tablespoons cocoa powder
- 2 tablespoons hazelnut spread (Nutella or similar)
For the Mousse Layer
- 1½ cups (350ml) heavy whipping cream
- 1 cup (240g) hazelnut spread
- ½ cup (120g) cream cheese, softened
- ¼ cup (30g) powdered sugar
- 1 teaspoon vanilla extract
For the Chocolate Topping
- ½ cup (90g) dark or semi-sweet chocolate chips
- 2 tablespoons heavy cream
- Chopped hazelnuts or chocolate shavings (optional, for garnish)
Preparation Time
- Prep time: 25 minutes
- Chill time: 4 hours
- Total time: 4 hours 25 minutes
Step-by-Step Instructions
Step 1: Prepare the Crust
- Combine crushed biscuits, cocoa powder, melted butter, and hazelnut spread in a bowl.
- Mix until the texture resembles wet sand.
- Press the mixture firmly into the bottom of a parchment-lined 8×8-inch (20x20cm) pan.
- Chill in the refrigerator for 20 minutes to set.
Step 2: Make the Mousse
- In a mixing bowl, beat the cream cheese and powdered sugar until smooth.
- Add hazelnut spread and vanilla extract, mixing until fully combined.
- In a separate bowl, whip the heavy cream until soft peaks form.
- Gently fold the whipped cream into the hazelnut mixture until light and airy.
Step 3: Assemble the Bars
- Spread the mousse evenly over the chilled crust.
- Smooth the top with a spatula and refrigerate for at least 2 hours to firm up.
Step 4: Add the Chocolate Topping
- Melt chocolate chips and cream together in a heatproof bowl over simmering water (or microwave in short bursts).
- Stir until glossy and smooth, then pour over the mousse layer.
- Sprinkle with chopped hazelnuts or chocolate curls if desired.
Step 5: Chill and Serve
- Refrigerate for another 2 hours (or until fully set).
- Slice into bars with a sharp knife and serve chilled.
Serving Suggestions
- Pair with a shot of espresso or cappuccino for the ultimate dessert experience.
- Serve with fresh raspberries or strawberries for a fruity contrast.
- For an extra crunch, add a layer of crushed hazelnuts between the crust and mousse.
Nutritional Highlights
| Nutrient | Per Serving (1 bar) |
|---|---|
| Calories | 310 |
| Protein | 4 grams |
| Total Fat | 22 grams |
| Saturated Fat | 10 grams |
| Carbohydrates | 28 grams |
| Sugars | 20 grams |
| Fiber | 2 grams |
| Sodium | 85 milligrams |
Nutritional Notes:
- Hazelnuts and cocoa provide healthy fats and antioxidants.
- No-bake method preserves the creamy texture without extra oils or baking fats.
- Heavy cream adds richness while keeping the mousse airy and indulgent.
Tips for Perfect Results
- Use good-quality hazelnut spread for the best flavor.
- Don’t overwhip the mousse — fold gently to keep it light and fluffy.
- For a firmer texture, freeze for 30 minutes before slicing.
- Store bars in an airtight container in the refrigerator for up to 5 days.
Variations to Try
- Vegan version: Replace cream cheese and cream with coconut cream and vegan cream cheese, and use dairy-free chocolate.
- Nut-free option: Substitute hazelnut spread with chocolate sunflower butter.
- Dark chocolate lovers: Add 1 tablespoon of espresso powder to the mousse for a mocha twist.
These No-Bake Chocolate Hazelnut Mousse Cake Bars combine luxurious textures and deep flavors in every bite. The buttery crust, airy mousse, and glossy chocolate topping come together in perfect harmony — all without needing to bake.
Whether you’re hosting guests or treating yourself to something special, this recipe delivers sophistication with minimal effort. One bite, and you’ll see why this dessert is destined to become a favorite.