
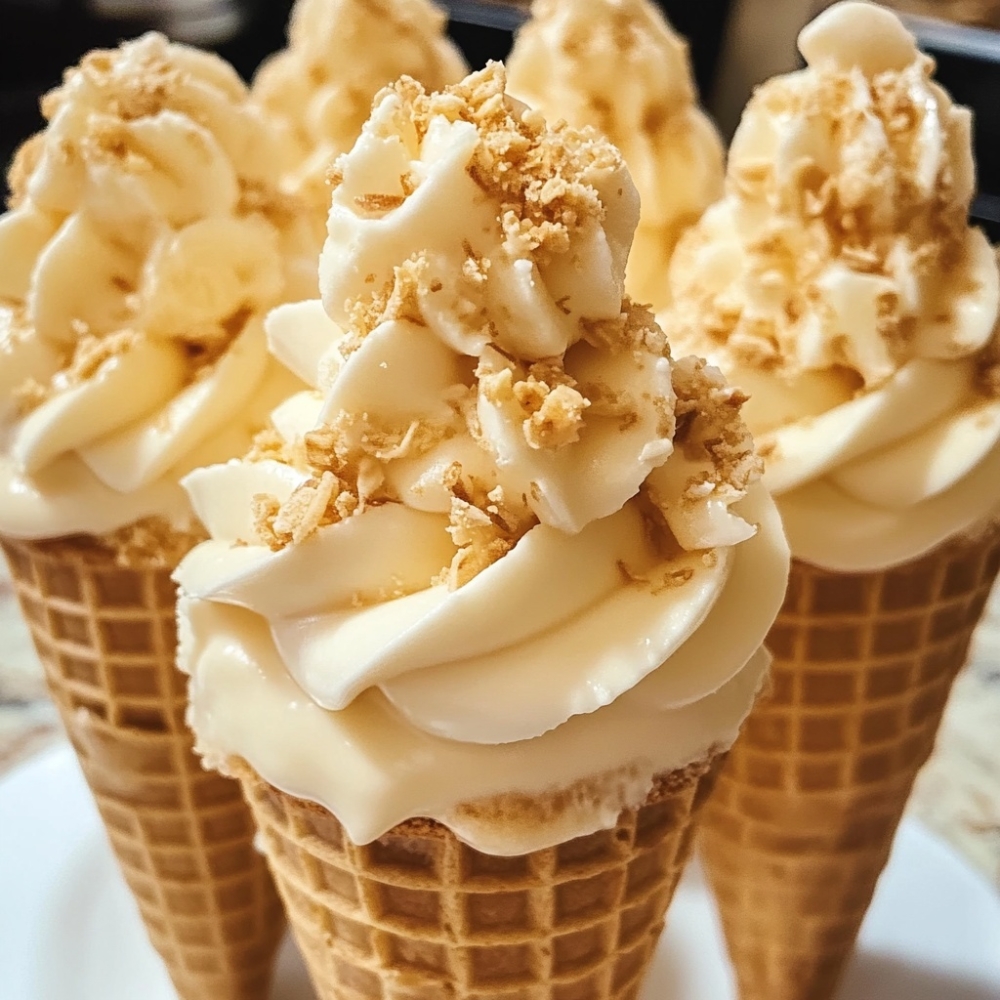
Looking for a crowd-pleasing dessert that is creamy, crunchy, sweet, and incredibly easy to make? These No Banana Pudding Cheesecake Cones deliver all the nostalgic flavors of banana pudding — without the bananas — in a fun, handheld cone. Perfect for parties, picnics, or when you need a no-bake dessert with a modern twist, these cheesecake cones are rich, satisfying, and highly customizable.
Unlike traditional banana pudding, this version focuses on the creaminess of cheesecake filling, the crunch of crushed vanilla wafers, and the crisp bite of a waffle cone, making it a delicious option even for those who aren’t fans of bananas.
Ingredients
This recipe makes approximately 6 to 8 cones, depending on cone size.
For the Cheesecake Filling
- One package cream cheese, softened (about eight ounces)
- One third cup granulated sugar
- One teaspoon vanilla extract
- One cup cold heavy cream (or one tub whipped topping, about eight ounces)
- One tablespoon instant vanilla pudding mix (optional for flavor and thickness)
For Assembly
- Six to eight waffle cones
- One and a half cups crushed vanilla wafer cookies
- Whipped cream or extra whipped topping (for garnish)
- White chocolate chips or almond bark (optional for dipping cone rims)
- Crushed cookies or graham cracker crumbs (for decorating rims)
Preparation Time
- Prep time: 20 minutes
- Chill time (optional for firmer texture): 30 to 60 minutes
- Total time: 20 to 80 minutes
No baking is required, and the recipe can be made ahead.
Instructions
Step 1: Prepare the Cheesecake Filling
- In a mixing bowl, beat the softened cream cheese, granulated sugar, and vanilla extract until smooth and fluffy.
- Slowly add the cold heavy cream (or thawed whipped topping), beating on medium-high speed until stiff peaks form.
- If using, mix in the instant vanilla pudding powder to thicken the filling slightly and enhance flavor.
- Transfer the mixture to a piping bag or large zip-top bag for easier cone filling.
Step 2: Prepare the Cones
- If desired, melt white chocolate chips or almond bark in a microwave-safe bowl.
- Dip the rims of each waffle cone into the melted chocolate, then roll in crushed cookies for added texture.
- Set the cones upright in a glass or cone stand and allow the chocolate to set, about 5 to 10 minutes.
Step 3: Assemble the Cheesecake Cones
- Pipe a small amount of cheesecake filling into the bottom of each cone.
- Add a spoonful of crushed vanilla wafers, pressing down slightly.
- Continue alternating layers of filling and crushed wafers until the cone is filled to the top.
- Finish with a swirl of whipped cream, a sprinkle of cookie crumbs, or a drizzle of caramel or white chocolate if desired.
Serving Suggestions
- Serve immediately for a soft, creamy filling or refrigerate the cones for 30 minutes for a firmer, more cheesecake-like texture.
- Decorate with edible glitter, sprinkles, or mini cookies for themed parties.
- Store leftover cones in the refrigerator uncovered to prevent sogginess.
Nutritional Highlights
| Nutrient | Per Cone (approximate) |
|---|---|
| Calories | 320 |
| Protein | 4 grams |
| Total Fat | 20 grams |
| Saturated Fat | 12 grams |
| Carbohydrates | 30 grams |
| Sugars | 22 grams |
| Fiber | 1 gram |
| Sodium | 180 milligrams |
Key Benefits:
- Offers a rich, satisfying dessert with no baking required
- Cream cheese and heavy cream provide a smooth texture and satisfying fat content
- No bananas, making it ideal for those with allergies or preferences
- Individual servings make it perfect for parties and dessert tables
Customization Ideas
- Swap vanilla pudding mix with cheesecake-flavored pudding for a richer filling.
- Use chocolate-dipped waffle cones or flavored cones for variety.
- Add mini chocolate chips, crushed Oreos, or caramel bits between layers.
- Make a gluten-free version with gluten-free cones and cookies.
Common Mistakes to Avoid
- Do not overbeat the cream once added to the cream cheese. It may become grainy.
- Avoid overfilling cones too early before serving; they may soften or become soggy.
- Make sure cream cheese is softened to avoid lumps in the filling.
- Use fresh, crisp waffle cones for the best texture.
No Banana Pudding Cheesecake Cones are the perfect marriage of nostalgia and modern dessert presentation. With all the creamy satisfaction of banana pudding — minus the bananas — these cones are fun, easy, and endlessly customizable. Whether you’re hosting a party or craving a quick treat, this no-bake dessert is guaranteed to become a favorite.